Making a charge/sync cable for an iRiver HD player
By Haku
| DISCLAIMER: This page is merely a guide on how to modify a USB A to mini-B cable into one with switches and a power plug for putting inside a docking unit. If you decide to make your own cable and anything goes wrong, I do not claim responsibility for others actions, you undertake any modification at your own risk. |
(click any picture to see it at full-size)
First of all you will need to get:
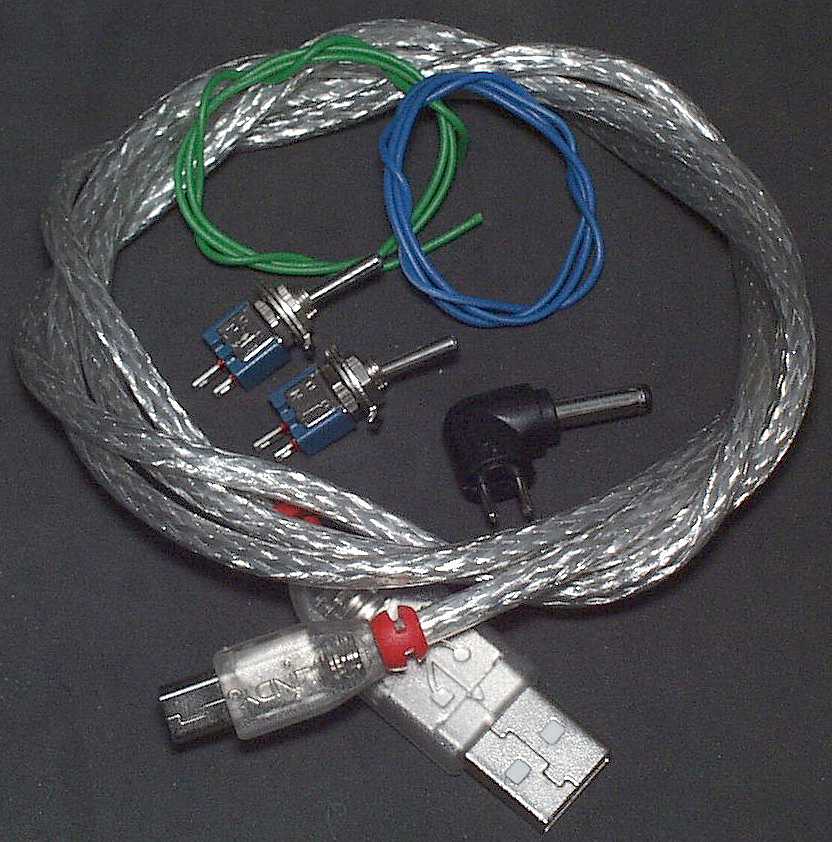 You'll also need these tools:
First start off by cutting off some of the outer plastic of the USB cable near the mini-B plug (the one that plugs into the player), best way to do it is to use the sharp knife, cut a single circle round (but not right through the cable) then about an inch and a half or two away from that another circle, then cut a line between the two and peel off the piece of plastic. The first layer you'll get to after removing the plasic is the shielding wire, don't cut this but pull it out to one side so you get to the next layer which is some thin silvery plastic: 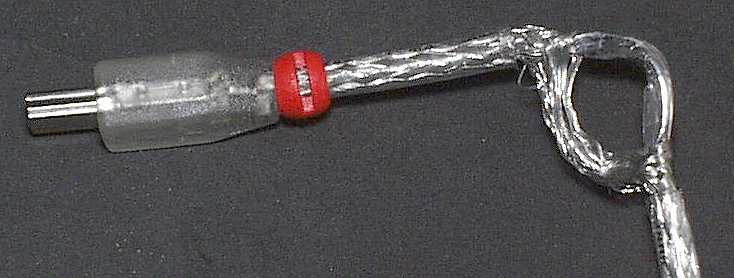 Next carefully cut the silver plastic off so you get to the 4 core wires: 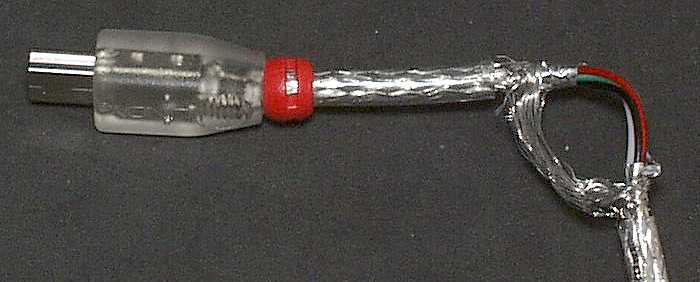 At this point you should see four different coloured wires, white, green, red, black, if you don't see those specific coloured wires you cannot continue as you won't know what wires are what:
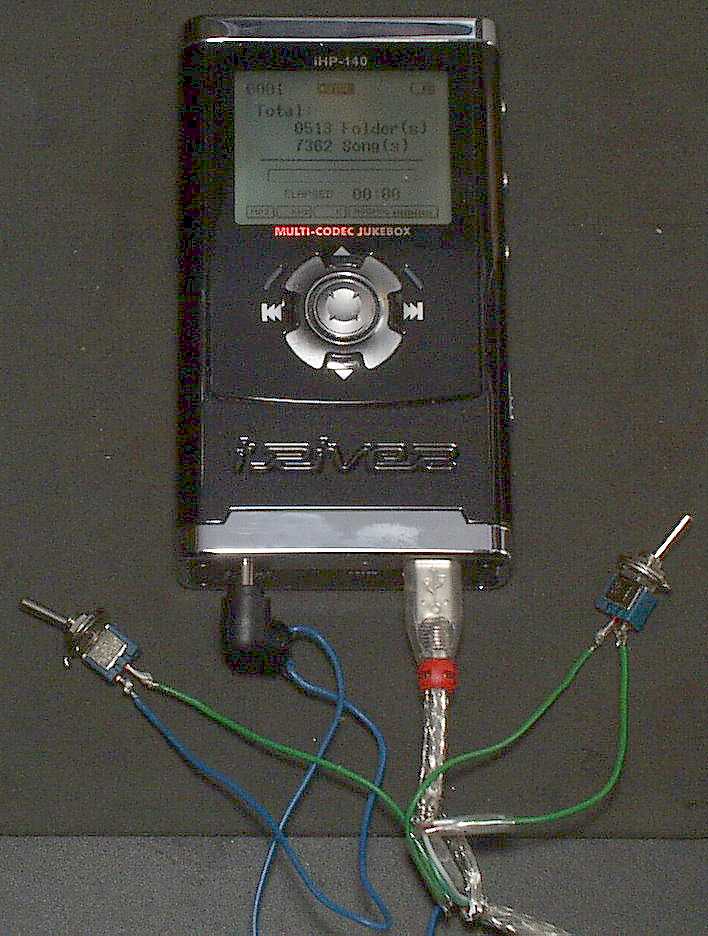
Now with the wires exposed, cut the red and black wires: 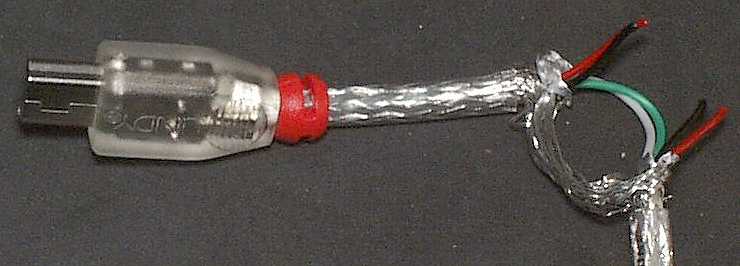 Now take a piece of wire, solder one end to the two black wires of the USB cable, then the other end of the wire to the negative (-) line of the power plug: 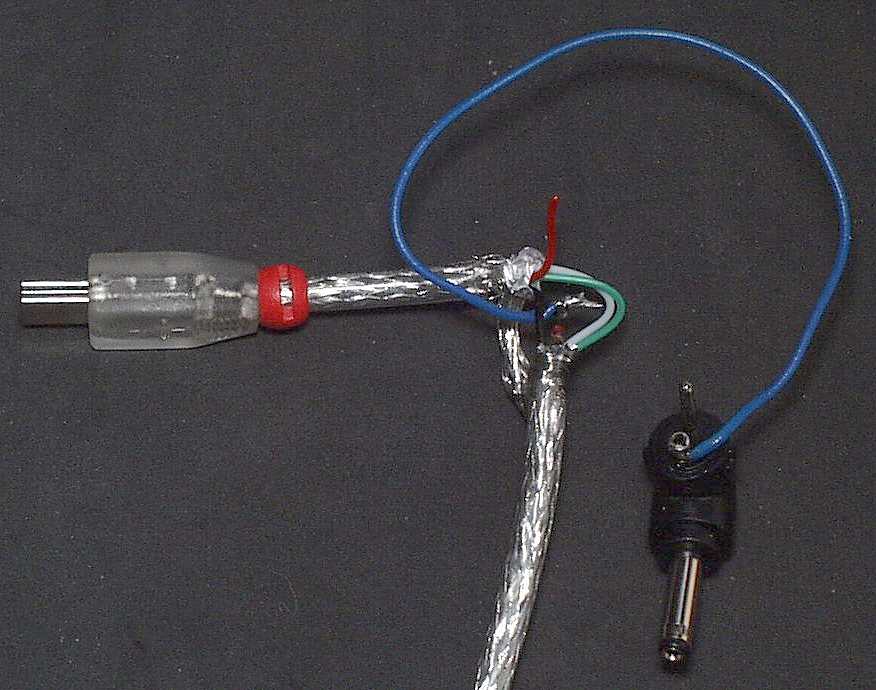 Before soldering the wire to the power plug, check which line to solder it to, the polarity of the iRiver H players is; center positive (+), outside negative (-). Easiest way to make 100% sure is using a multimeter in resistance test mode, touch one of the multimeter leads to the outside of the plug and the other to one of the pins, if the multimeter reacts then you know you've got the correct pin for wiring the negative (-) wire to. Now take two pieces of wire of about equal length, solder the ends of both wires to the red wire (furthest away from the mini plug) of the USB, and the other ends of the wires to the two switches: 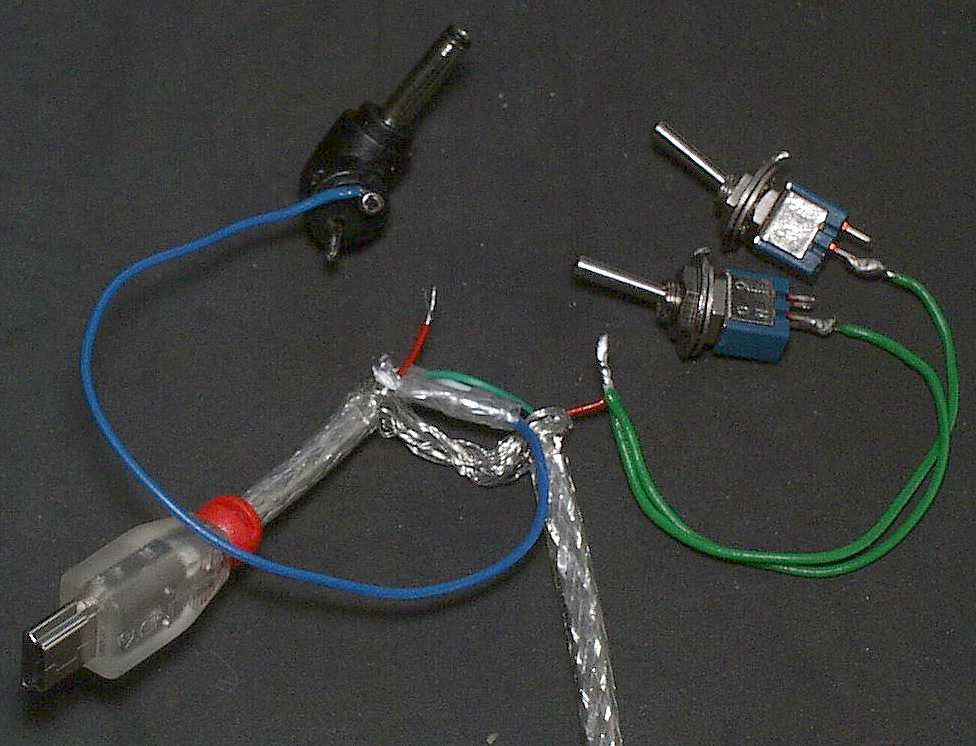 Then tape up the soldered wires. Using another piece of wire, solder it between one of the switches and the other red wire on the USB cable: 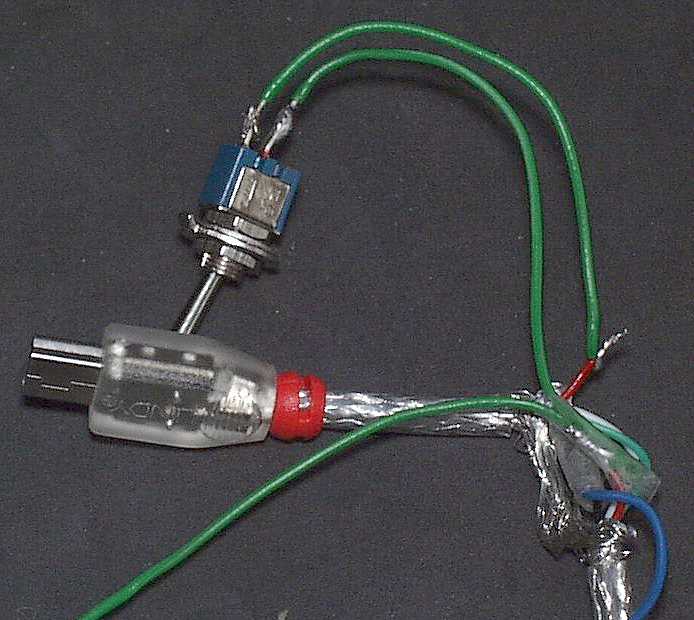 Then tape up the soldered wires. With one last piece of wire, solder one end to the power plug and the other end to the other switch: 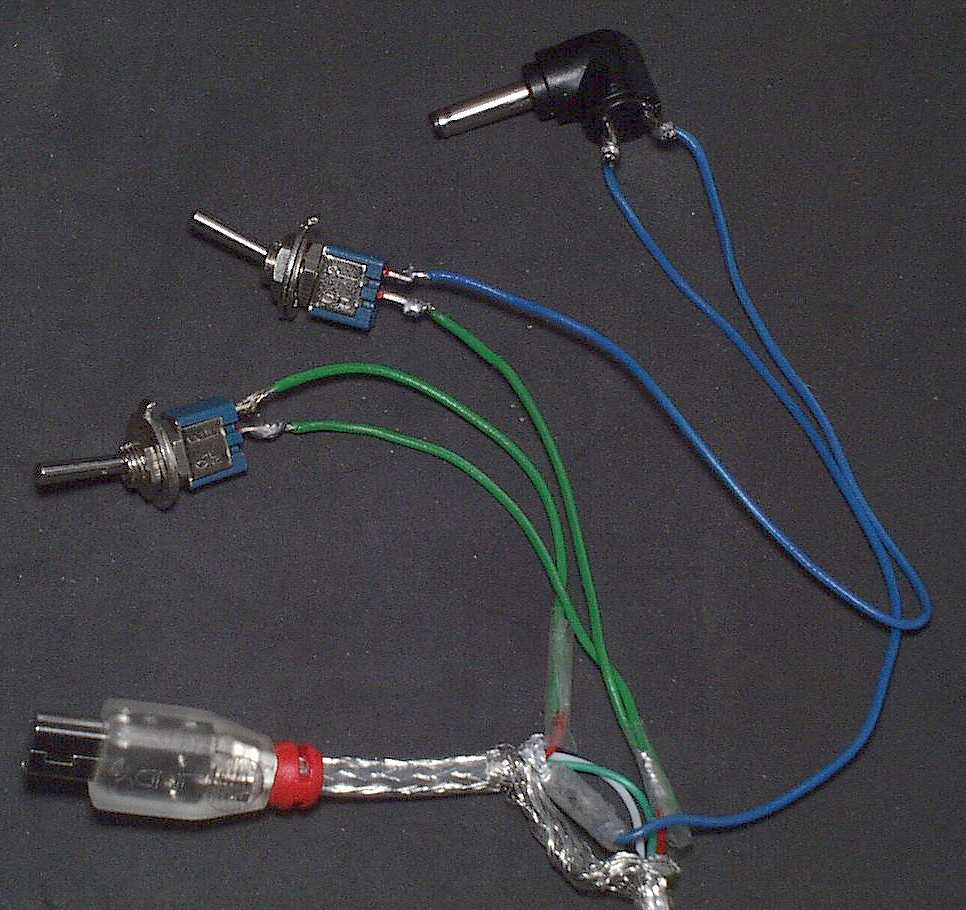 Et voila, one completed modified cable with switches for connection/disconnection & charging. But BEFORE you plug anything in do some checking with your multimeter! I will not be held responsible for any damage caused, everything you do is at your own risk. The only guidance I can give you here is to firstly switch both switches to ON, with the multimeter in resistance test mode touch it's leads to the two pins on the power socket - this will test to find out if the +5v and 0v lines have accidentally connected somewhere, they shouldn't be connected. If they are connected you will need to findout where and solve the problem. So far that's the only major worry, with that test turning out OK now plug the A plug into the powered-up computer, put the multimeter into voltage test mode so it can measure 5v, touch the red lead of the multimeter to the center of the power plug and the black lead to the outside, the multimeter should read 5v, if you have a digital multimeter and it shows -5v or an analogue multimeter and the needle tries to go backwards then you've wired the plug the wrong way round, to rectify this unplug the lead from the PC and re-solder the wires the other way round then do the checks again. If both tests pass then switch both switches to OFF, insert the power plug into your iRiver harddrive player and the USB mini-B plug also into the player, power up the player, once it's up and running try the power switch - the green charging light should come on, then try the connect/disconnect switch - the player should go into connect mode. Be warned that if you switch the connect/disconnect switch without doing the unplug thing on the computer you may lose data transferred to it, cause phantom files etc. which will need to be fixed using your computer's scandisc program. How you mount the two plugs and two switches into a dock is for you to figure out! Here are a couple of pictures of my iHP-140 connected up to the lead I just made in the pictures, first image is with both switches OFF, second is with both switches ON:
|

fox@ridhughz.demon.co.uk
back...